NMR Operations for QE 300 with Tecmag Data System

Prepared by M.D. Timken and M.R. Schultz 1/94. Revised S.E. Van Bramer 7/95. HTML Markup 7/96. Revised for Tecmag 1/02.

Magnetic Materials and Safety Considerations

  1. If you have a pacemaker or other metallic implant, do not enter Room 421. The large magnetic field associated with a 300MHz superconducting magnet can interfere with the operation of a pacemaker, or could possibly result in tissue tears at the site of a metallic (magnetic) implant.

  2. Do not put any magnetic (mainly iron) items near the magnet. The magnet will strongly attract such items. For example, a moderately heavy item like a wrench or even a screwdriver could puncture the stainless steel vacuum dewar if it were dropped near the magnet. Keep such items on the "door-side" of the yellow warning rope.

  3. A massive magnetic item like a gas cylinder could move the superconducting coil, even if the cylinder did not come in contact with the dewar. Do not bring such a cylinder into Room 421 unless you have permission from Marty Schultz or Professor Van Bramer.

  4. And even small items like paper clips or staples can eventually find their way up into the magnet and thus interfere with the collection of spectra. So try not to drop such items in the room, and certainly do not take them past the yellow warning rope.

  5. The magnetic field is strong enough to erase information from magnetic storage media. Such media (found on credit cards, ATM cards, computer diskettes, and audio tapes) should be removed from your person before you cross the yellow warning rope. It would be wise to remove your wallet and analog watch before crossing the yellow warning rope.

  6. Do not work unsupervised. You should always arrange your work on the NMR with either Professor Van Bramer or Marty Schultz.

  7. Follow directions. The NMR is an expensive piece of equipment (worth about $150,000) and can be damaged if used improperly.


Sample Preparation

  1. Samples should be run as solutions in one of the deuterated solvents found in the cabinet in Room 421. (NOTE: The use of a deuterated solvent is necessary because the spectrometer uses the deuterium NMR signal to lock the magnetic field.) In preparing your samples, it is best to use one of the high-quality 8" NMR tubes, although the 7" tubes can provide adequate spectra for routine samples.

  2. For liquid samples, use a clean disposable pipette to add carefully one or two drops of sample to a clean, dry NMR tube. Then use the sample gauge to add deuterated solvent to a height of 4 cm from the bottom of the tube. (The the mark on the short side of the gauge.) Cap and mix the sample well.

  3. For solid samples, use a microspatula to add carefully one or two spatula tips of sample to a clean dry NMR tube. Again, fill with solvent to 4 cm, cap, and mix well.

  4. Of course, problems such as air instability, water instability, or low solubility will require different approaches for preparing good samples.

  5. Always wipe the outside of your tube with a clean Kimwipe before placing it into the spectrometer. This step will keep the spectrometer probe clean and free from contaminants and skin oils.


Initial Conditions

  1. The QE300+ spectrometer is always "on". You may, however, need to turn on the computer or load the MacNMR software. A line-shape sample (CHCl3 in deuterated acetone) should always be in the spectrometer if no other sample is being run.

  2. The computer should have the QE H1 Setup running. The window below will display on the computer. If it is not running, open the program MacNMR 5.6 and select the QE H1 Setup.


Setting up the QE300+ NMR Spectrometer

  1. The QE300+ uses a Tecmag data acquisistion system to run the instrument and process data. This software is controlled by the Mac computer on the instrument console.

  2. Sign-in the Logbook. Record all requested information.

  3. Load Your Sample into the Spectrometer.
    1. Remove the plastic cap from the top of the magnet stack.
    2. Eject the current sample from the spectrometer. Click on the button ih the QE H1 Setup window to open the instrument control console.

    3. Switch to the lock control, by pressing the lock button and switch the lock to standby.
    4. Switch to the frequency console using the frequency button on the control panel.
    5. Eject the sample by presssing the eject button.
    6. Get a Kimwipe to carefully remove the sample and spinner from the stack.
    7. Carefully remove the spinner by sliding it off of the NMR tube. (Do not to touch the spinner with your fingers, use a Kimwipe.)
    8. Place the spinner on your sample tube, and adjust the spinner height with the gauge. (Using the tall side.)
    9. Wipe the sample region again with a Kimwipe, and carefully replace it in the stack.
    10. Lower the sample into the spectrometer probe by pressing the load button.
    11. Replace the plastic cap on the magnet stack.

  4. Setup the solvent lock.
    1. Enter the shim mode by pressing the shim control button and load the shims for your solvent.
    2. Switch to the lock control, by pressing the lock button . The control panel is shown below.

    3. Select the solvent from the pull down menu.
    4. Set the transmitter power (lock TR) and the zero offset (ZO offset) for the solvent using the table below.

      SolventTRZO
      Acetone120130
      CDCl322080
      C6D616090
      DMSO15090
      Methanol140110
      D2O15075

    5. Check the lock signle by pressing the sweep button.
    6. Lock the Spectrometer to the Deuterium Solvent NMR Signal and then run the autolock to optimize the lock settings.

    7. Shim the Magnetic Field to Decrease the Linewidth of the Signal.
      1. Whenever a new sample is placed in the spectrometer, it is necessary to optimize the homogeneity of the magnetic field. This is called "shimming" the magnet. Shimming results in narrower and more symmetric NMR signals and better resolution. The QE300+ uses a program that automatically shims the magnetic field by maximizing the deuterium lock signal.

      2. Enter the shim mode by pressing the shim control button . The control console is shown below.

      3. Select the shims to set (typically Z1, Z2 and Z3 spinning shims.
      4. Run the autoshim program by pressing the start button.
      5. Close the console.


    Collecting Proton Spectra.

    1. Set the Receiver Gain.
      1. For each sample, it is necessary to set the receiver gain to insure that the NMR signal coming from the probe is neither too large or too small to be digitized. (NOTE: This step is roughly analogous to adjusting the volume control on a radio - you adjust the volume so that the receiver (your ears) are not overloaded by sound, but so that you can hear the radio.) Again, the easiest way to adjust the receiver gain on the QE300+ is to use an automatic program called a script.
      2. Run the auto reciever gain script using the script menu from the menu bar.

    2. Collect and Save the H-1 NMR Free-Induction Decay (FID) Signal.
      1. Open the dashboard using the icon in the QE H1 Setup Window. The Dashboard window is shown below.
      2. Set the number of acquisitions. This number should be a multiple of 8 for proper phase cycling. A value of 16 or 32 is usually adequate for H-1 samples.
      3. Set the acquisition delay (Last Delay).
      4. Set the Points 1D.
      5. Run the experiment {Commands, Zero and Go}. The monitor should display the FID; it will take a few minutes to complete the data collection. The Acquisition Status will display the time and scans remaining.
      6. Save the FID data. Use a *.NMR extension for the file.

    3. Process the H-1 NMR Spectrum.
      1. Correct the baseline of the FID.
      2. Zero fill the FID.
      3. Fourier Transform the FID to the NMR spectrum.
      4. Run an autophase (AP) script using the script menu from the menu bar.

      5. Set the TMS peak to 0.0 PPM.
        1. Zoom in on TMS Peak, Drag region then click on it to expand. Return by clicking on full spectrum shown above.
        2. Click on peak
        3. {Display, Set Reference}
        4. Enter 0
        5. click OK.
      6. Integrate the H-1 Spectrum. {Options, Integral, then drag.}
      7. Print the Spectrum.
      NOTE: If you do not need to collect C-13 NMR data, go to the directions for completing your work on the QE 300.


Collect C-13 Spectra.

  1. Change the spectrometer settings to collect carbon-13 data by closing the QE H1 Setup and reopening Mac NMR 5.6 using the QE C13 Setup.

  2. Since you have already locked and shimmed the spectrometer for your proton NMR spectrum, it is not necessary to repeat these procedures.

  3. Set the Receiver Gain. Run the auto reciever gain script using the script menu from the menu bar.

  4. Set the acquisition delay in the dashboard (Last Delay).
  5. Set the pulse width in the dashboard.
  6. Run the experiment {Commands, Zero and Go}. The monitor should display the FID; it will take a few minutes to complete the data collection. The Acquisition Status will display the time and scans remaining.
  7. Save the FID data. Use a *.NMR extension for the file.

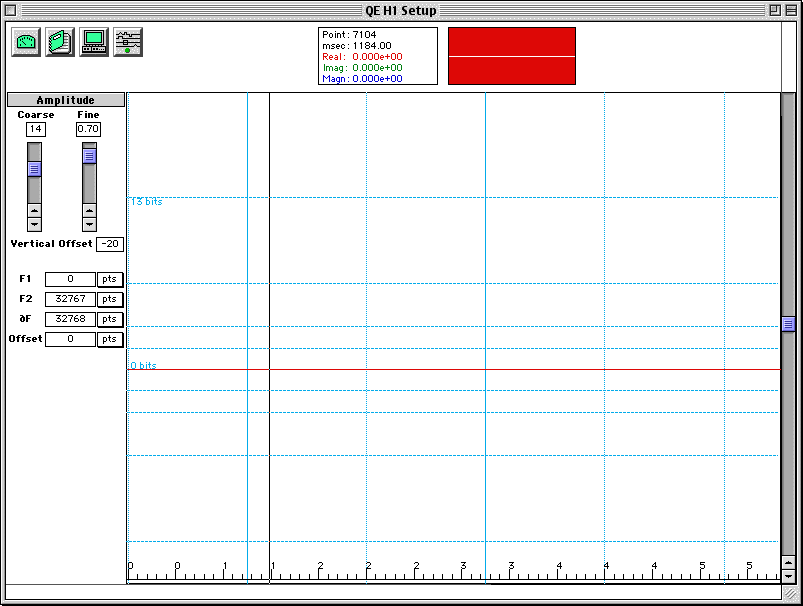
  • Process the C-13 NMR Spectrum.
    1. Correct the baseline of the FID.
    2. Zero fill the FID.
    3. Exponential multiply the FID (Commdand Exponential Multiply). (This multiplication increases the signal-to-noise but also increases the linewidth of the NMR signals. The LB 1D is set in the Dashboard. The EM command only works if the line broadening parameter is nonzero. A LB of 1.0 should work well.)
    4. Fourier Transform the FID to the NMR spectrum.
    5. Run an autophase (AP) script using the script menu from the menu bar.

    6. Set the TMS peak to 0.0 PPM.
      1. Zoom in on TMS Peak
      2. Click on peak
      3. {Display, Set Reference}
      4. Enter 0
      5. click OK.
    7. Print the Spectrum.
    8. Carbon-13 NMR spectra do not typically provide useful integrations. So there is no need to integrate your C-13 spectrum. If you would like run a C-13 spectrum for integration, see Dr Van Bramer for details.


    Complete Your Work on the QE300+.

    1. Remove the pens from the plotter pen carriage. SHUT THE PEN CARRIAGE IMMEDIATELY AFTER REMOVING THE PENS.

    2. If you ran C-13 spectra, change the spectrometer to collect proton data.

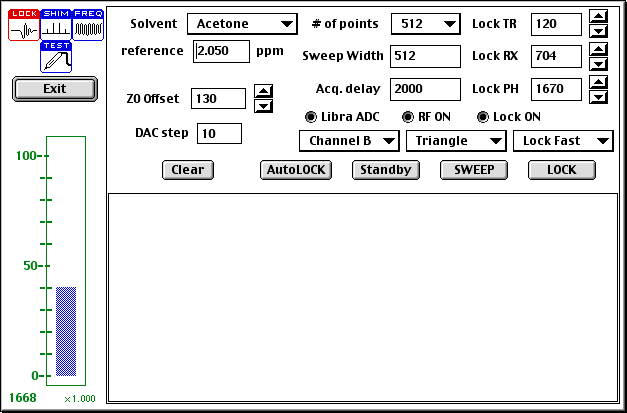
    3. Replace your sample with the line-shape sample.

    4. Reset the solvent to D-6 Acetone.

    5. Lock the sample as described previously (setting the transmitter Gain to 120 and the offset to 130).

    6. Shim the magnet.

    7. Sign out of the log book.


    Transfer Files

    The computer is setup as a web server, so the data files are available using any web browser. The URL is: http://147.31.140.63
    This page is maintained by
    Scott Van Bramer
    Department of Chemistry
    Widener University
    Chester, PA 19013

    Please send any comments, corrections, or suggestions to svanbram@science.widener.edu.

    This page has been accessed times since 1/5 /96 .
    Last Updated Tuesday, January 22, 2002 4:06:37 PM